Wednesday, December 25, 2013

DIY Vintage Christmas Ornaments

I made these ornaments to give to a few people on my Christmas list. I had seen some on a retail website and thought I can make those myself!
I found some cute vintage images on the internet and printed them on cardstock and then cut them out.
Below are the tools needed for this project: a glue gun with extra glue sticks, wire snippers, some pipe cleaners and a mat to work on.
Heat up your glue gun and decide what color of pipe cleaner you want to put around the edges of your images and start to bend it around one long edge and half of the top. Then glue that down. Next bend the pipe cleaner around to make a loop for your ornament to hang from and finish gluing the rest of that pipe cleaner around the edge of the image. Then take another pipe cleaner and cut a piece off that will fit the rest of the ornament and attach it with the hot glue. Repeat those steps for each one.
Here are some more pictures of my finished ornaments:

Happy Holidays!

Wednesday, December 18, 2013

Quick and easy DIY Christmas cards

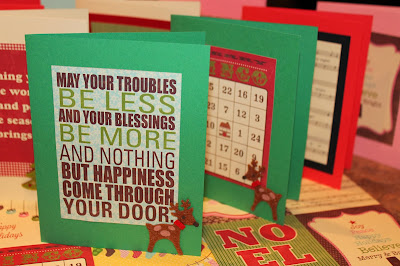
I made ten Christmas cards out of one sheet of 12x12 paper, cardstock and embellishments that I already had in my craft room. Here are the tools I used to make them:
I used a glue stick to adhere the paper together until it ran out and then I used photo sticker squares and they both seem to work well. I used glue dots to adhere the embellishments on each card. I had some rub-on Christmas sayings and stickers that I used also. You could also use ribbon on these or whatever you have around the house to decorate these. The red snowflake I used on the one below was actually packaged as table scatter but it worked. Get creative with what you already have. 
Here are some more pictures of my cards.
The inside of these are currently blank but I might use a Christmas stamp on the inside when I sit down to write them out to my family and friends.
Happy crafting!